Installation for Manufactured Stone Veneer
- If you’ll be installing the stone product on an exterior project, current building code requires a moisture barrier such as 2 layers of tar paper or two-ply 60-minute grade D paper be applied directly to the building’s surface. Be sure to lay the tar paper from the bottom up so that the top sheets overlap the bottom. Overlap 2 inches on the horizontal seams and 6 inches on the vertical seams. Check your local building code for other specific moisture barrier requirements in your area.
- Directly over the tar paper, or directly over the sheeting on an interior project, cover the area with wire lath. A 3.4 diamond wire lath is recommended.
- Hang the lath horizontally.
- Overlap the lath at least 6 inches on the vertical seams, and at least 2 inches on the horizontal seams.
- The lath should feel rough as you run your hand up over it, and smooth as you run your hand down over it.
- Use a hammer and 1 3/4″ roofing nails, or an air stapler to fasten the lath to the studs every 6 inches. Then use an air stapler or a hammer tacker to fasten any loose areas or bulges between the studs. A shorter length staple is okay for use between studs.
- Cut the lath using a tin snips.
- When working with corners, fold the lath tightly around the corner, and overlap a new piece on the other side as you would anywhere else. This rule applies for inside corners also; fold the lath at a 90 degree angle and fit it tightly into the corner, overlapping the lath on each side.
- Never have a seam on a corner.
- It is very important to nail the lath on both faces of the corner.
- You will need to mix three separate batches of cement, one for the scratch coat, one for the mortar, and one for the grout. Each requires a specific ratio of sand, and either portland or masons cement.
- Scratch Coat – 1 part Portland cement to 2 1/2 parts sand
- Mortar – 1 part Portland cement to 2 parts sand
- Grout – 1 part Mason’s cement to 2 parts sand
- Note: An alternative cement for interior work only is to use “Type M” cement for the scratch coat, mortar, and the grout. The ratios of cement to sand remain the same. Pre-mixed mortar is okay too.
- Dry mix the sand and cement together with a hoe in a wheelbarrow or mud box. This will avoid creating clumps in the mixture.
- Slowly add water to the mixture a little at a time and continue to mix. You can always add more water later, but if you add too much, the mixture will become runny and unusable.
- Continue mixing the cement adding small amounts of water as needed until it has the consistency of paste.
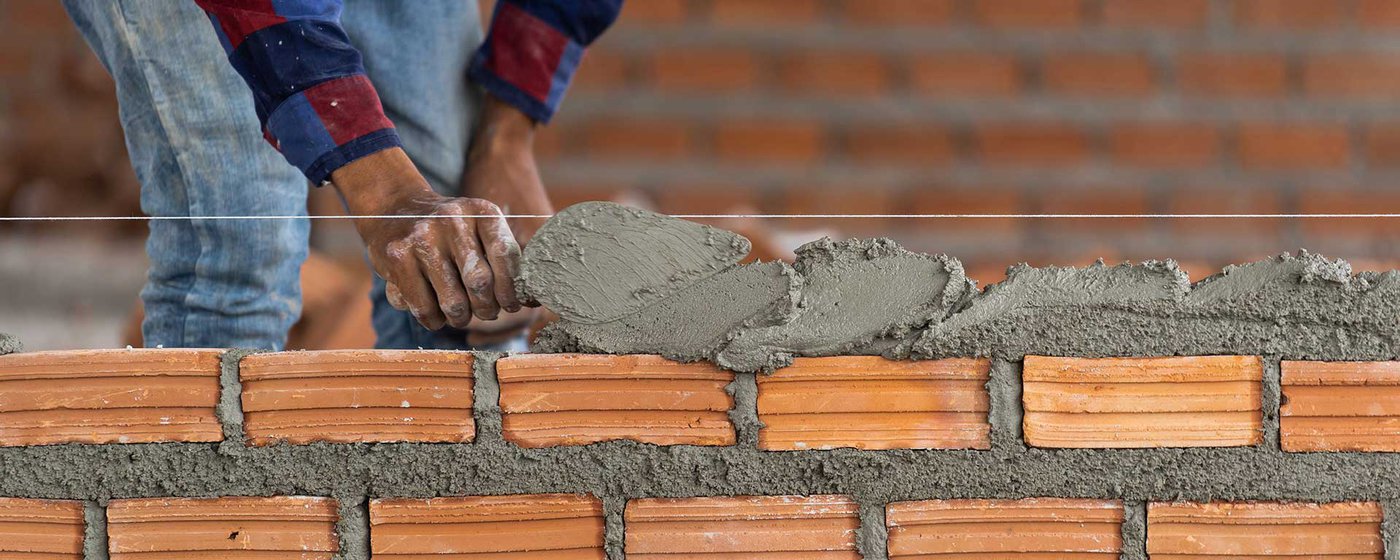
- Use a masonry trowel to spread an even layer of cement over the wire lath. Cover the entire area of lath with the cement mixture. Work the cement into the holes of the lath, and scrape off the excess.
- While the cement is still slightly wet, use a soft bristled brush to rough up the scratch coat a little. This will give the stone a better surface to grab to. Virtually no cement should be removed with the brushing process.
- Let the scratch coat dry before going on to the next step. Drying time will depend on temperature, humidity and airflow, and could take anywhere from 2 to 24 hours. You’ll know its dry when it turns a light gray color.
- Mix a batch of mortar, using 1 part portland cement and 2 parts sand.
- Before you apply any of the stone, lay out a couple of boxes in front of your project. This will give you a sense for the variety of shapes and colors you’ll be working with. Arrange the pieces so they fit and look nice next to each other, and try to avoid clumping colors together all in one area.
- Start at the corners and work toward the center of the wall. Be sure to alternate long and short returns on corner pieces.
Installation of Dry Stackable Patterns
With these patterns that only work with Manufactured Stone, you should work from the bottom up, due to the weight. There are no joints or gaps between these pieces of stone, the pieces stack directly on top of the pieces below, and tightly against the pieces next to it. Be sure to check your work often with a level. If you’re working with one of these dry stackable patterns, it is recommended you mix your mortar with a latex bonding agent, available from your supplier. Also, these stones should be laid in rows of pieces of the same height, so that when you start each row, you should have a flat level surface to work on.
- With some patterns, it’s a good idea to lightly etch guidelines into the scratch coat, using a 4′ level and a pencil, or snap line.
- It’s always a good idea to size the stone up before you apply any mortar, just to make sure it will fit properly and look good next to the other pieces.
- To lay the stone, use a trowel to spread about a 3/8” to 1/2-inch layer of mortar to the back of the stone. Lay the stone against the wall, press and shake it gently into place.
- There are no special pieces for working on inside corners, just meet the two pieces together. Remove mortar that has pressed out from setting before applying the next course.
- Any power saw with a masonry blade will work. This cutting will be very dusty, so be sure to wear safety glasses and a dust mask and do all the cutting outdoors. Other times you may want to break the stone to keep a more natural looking rough edge. You can use a nipper to trim small amounts off the stone, or the back of your masonry hammer to crack a piece in half.
Installation of Dry Stackable Patterns
Whenever possible work from the top down to prevent cement from dripping on stones beneath. That is unless you’re working with one of our dry stackable patterns, which are designed to be laid from the bottom up, due to the weight.
- Size the stone up before you apply any mortar, just to make sure it will fit properly and look good next to the other pieces.
- To lay the stone, use a trowel to spread about a 3/8” to 1/2″ layer of mortar to the back of the stone. Lay the stone against the wall, press, and shake it gently into place.
- There are no special pieces for working on inside corners, just meet the two pieces together.
- Any power saw with a masonry blade will work. This cutting will be very dusty, so be sure to wear safety glasses and a dust mask and do all the cutting outdoors. Other times you may want to break the stone to keep a more natural looking rough edge. You can use a nipper to trim small amounts off the stone, or the back of your masonry hammer to crack a piece in half.
- Mix a batch of cement with 1 part masons cement and 2 parts sand, or approved premix.
- Cut about a 1/2″ hole in the tip of your grout bag. It’s best to start by cutting a smaller hole, and you can always cut more later, but if the hole is too big, the cement will drip out and stain the stone.
- Fill your grout bag about half full of the grout mixture. Texture should be loose to flow through the bag.
- Twist the top end of the bag and squirt some grout back into the bucket. This will prevent air pockets from causing the grout to accidentally squirt out explosively.
- Keeping the top end of the bag twisted, gently squeeze the grout into the joints. Fill all the gaps between the stones with about a half inch layer of grout. The grout will tighten and seal up the area around the stone.
- Let the grout dry until it is firm but not solid. You want to be able to push on it without leaving fingerprints, but don’t let the grout turn gray or it will be very difficult to strike.
- We recommend using a hardwood stick such as oak for striking. Keep the sticks square by cutting the tops off them if they get worn down, or a 1/8” to ¼” tuck pointer.
- Striking the grout gives your project a finished look. Use your striking stick to scrape along the edges of stone and joints until the grout has a clean, even look to it.
- The grout should crumble away like sand. If it smears, or crumbles away in large chunks, that means the grout is still too wet.
- Finally, use your soft bristled brush to sweep the dust off the stone.
- If you wish, mortar joints can be tuck pointed as you go or use a grout bag once you have a section done that can dry while you work on laying another section. Setting time will vary by the absorption rate of the stone you are using. If your mortar joints take 1 to 2 hours to cure enough to tool, then you should not grout joints for the last 1 to 2 hours you plan to work. You want to tool your mortar joints at the same consistency throughout the project to ensure all mortar joints are the same color.
- Tooling a section while the mortar is wetter/looser than when you tooled other wall sections that section will dry and stay lighter in color due to bringing too much moisture to the surface during tooling. “I recommend tooling when mortar has “cookie crumb” consistency. Do not try to grout more wall than you can tool in 30-45 minutes, or the last portion may get too dry and make more work for you”.
For additional information on the current, correct installation practices, including minimum spacing of movement joints please visit, Installation Guide and Detailing Options for Compliance with ASTM C1780 For Adhered Manufactured Stone Veneer 5th Edition, 5th Printing, published by the National Concrete and Masonry Institute, found on Eldorado Stone’s web site at; https://www.eldoradostone.com/wp-content/uploads/2023/06/NCMA-Installation-Guide_010423.pdf
Additional Notes:
Understand that as Manufactured Stone in a manmade product made from natural inconsistent ingredients, that color may fade over time, and efflorescence, a white chalky substance may become visible in the first couple of years. This substance can be removed or cleaned off with products approved by the manufacturer after the first year of curing.


